The Generator Installation Process in Nashua, Step by Step
Most installer pages describe installation day and skip everything before and after it. The truth is that the physical install is the shortest part of the project. This page lays out the whole sequence honestly: the call, the site visit and load calculation, the written quote, Nashua permits and inspections, scheduling, install day, startup and testing, and the walkthrough, with what you do, what the installer does, and how long each part usually takes.
Call (603) 633-8948Get a straight answer and a written quote
Step 1: The First Call
You describe the home: town, size, heating fuel and system, city water or well, septic or sewer, air conditioning count, the panel if you know it, and what you want running in an outage. A useful call ends with a size band, a fuel read, and a realistic price range from the published local figures, plus a site visit scheduled. A call that ends with a hard price and pressure to sign today is a warning sign. Nobody can price fuel runs, panel work, and placement sight unseen.
Step 2: The Site Visit and Load Calculation
The installer walks the property and the panel. The load calculation works from your panel schedule and appliance nameplates: heating, cooling, pumps, kitchen, laundry, water heating, and the discretionary loads, with motor starting surges accounted for and headroom added. Placement gets settled with a tape measure: a spot that meets the manufacturer's clearance requirements and local code, as close as practical to the panel and fuel source, because distance is money in wire, pipe, and trench. The fuel starting point gets verified: gas meter size and line capacity, or the propane tank's size, condition, and location. Anything that will move the price, an older panel, a long trench, a meter upgrade, a new tank, gets identified now and priced now.
Step 3: The Written Quote
You receive a written quote naming the exact generator model and its output on your fuel, the transfer switch and load management scope, the fuel work, the electrical work, the pad and placement, permits and fees, startup and registration, and the total, with deposit terms and exclusions stated. The cost guide has the full checklist. Read exclusions as carefully as inclusions. Rock in the trench path, landscaping restoration, and tank supply are classic gray areas that good quotes settle in advance.
Step 4: Permits in Nashua
With the quote approved, permits are filed with the City of Nashua's Building Safety Department, which handles permit applications for the city. Here is the part homeowners rarely hear explained: one project, several permits. The city states that a building permit includes only the structural portion of a project, and separate permits are required for plumbing, electrical, and mechanical work. A generator installation is at minimum an electrical project, the transfer switch and service work, and a gas project, the fuel line and connections, and the pad and placement can fall under the building side. There is an additional $50 filing fee for each permit, plus an additional fee for Land Use review where it applies. The city publishes fillable forms for this work, including an Electrical Permit form and a Residential Gas Piping Sketch, and accepts completed forms by email to the department. Your installer prepares and files these as part of the job. You should see permits posted or paperwork in hand before work begins, and you should keep the final signed off paperwork with your home records, because a future buyer or insurer may ask.
Inspections follow the work. The electrical side is inspected under the city's process, and electrical service work in Nashua also sits within the inspection framework Eversource publishes for New Hampshire towns, which covers services, upgrades and changeovers, and related items, with notifications handled online. In plain terms: expect the work to be looked at by someone other than the person who did it, at the stages the city and utility require, and expect the install schedule to respect those stages rather than burying work before it is seen. An installer who suggests skipping permits is suggesting you carry the risk for their shortcut, on your insurance, your resale, and your safety. Decline.
Step 5: Scheduling and Equipment
Once permits are moving, the equipment is ordered or pulled: generator, switch, load modules, pad, and the fuel side pieces. If a propane tank is part of the project, the propane supplier's schedule joins the plan, since tank sets have their own lead times and their own placement rules. The install is then booked as one or two working days depending on scope, with weather and inspection timing as the honest variables. Total elapsed time from signed quote to a running generator is usually measured in weeks, driven mostly by permit turnaround and equipment and tank scheduling, not by the install itself.
Step 6: Install Day
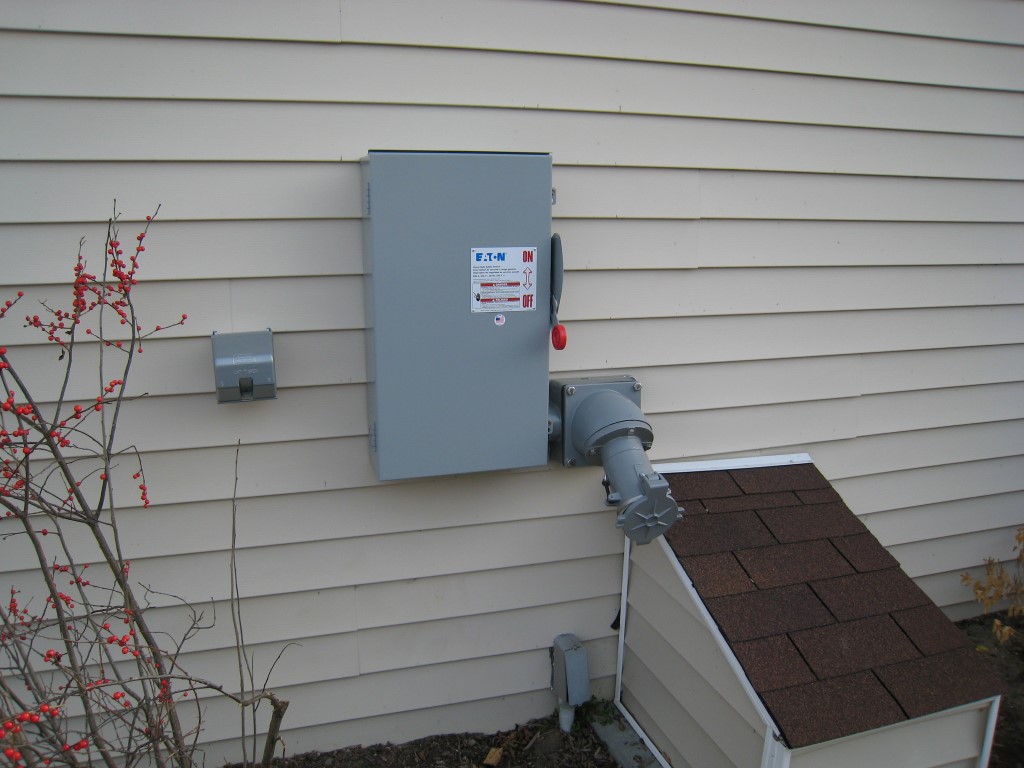
The pad goes in level and the generator is set and anchored. The gas line is run and pressure tested, or the propane connection is made and tested. The transfer switch is mounted and wired, the panel work is done, load management modules are connected to the heavy loads they will watch, and control wiring links the generator and switch. The home's power is off for a planned window during the service work, which the installer schedules with you in advance so the fridge stays shut and the household can plan around it. Trenches are backfilled and the site is left tidy, with final landscaping restoration handled as the quote described.
Step 7: Startup, Testing, and Walkthrough
Startup is a procedure, not a key turn. Fluids and battery are verified, the unit is started, and output is checked. Then the real test: the system transfers the home to generator power and back, under load, while the installer watches behavior, and heavy loads are run to confirm the load management does its job. The controller is configured, the exercise schedule is set to a sane hour, monitoring is activated where fitted, and the warranty registration is completed, since proper startup and registration are part of the manufacturer's warranty picture. The walkthrough covers the controller and its status lights, what an alert means, how to read the fuel or tank situation, where the manuals live, and your maintenance schedule. You finish the day knowing what you own.
What You Do and Do Not Have to Do
- You do: decide coverage, approve placement, be reachable for the planned power window, clear the work areas, and keep the final paperwork.
- You do not: file permits, arrange inspections, run wire or pipe, move a several hundred pound generator, or guess at clearances. That is the job you hired out.
- You decide later, unhurried: the maintenance plan and any extended warranty paperwork, which deserve a read at the kitchen table rather than a signature on install day adrenaline.
Request a Generator Quote
Common Questions
How long does the whole process take, start to finish?
Usually a few weeks end to end: days to the site visit and quote, then permit turnaround and equipment or tank scheduling, then one to two days of installation and the inspection sequence. Anyone promising a running generator in a few days from a cold start is skipping steps you will meet later.
Will my power be off during the install?
Yes, for a planned window while the transfer switch and service work are done. It is scheduled with you ahead of time, measured in hours, and it is the only outage the project causes. Keep the fridge closed and plan the work from home day around it if you can.
Who pulls the permits?
The installer, in the open, as part of the quoted job. In Nashua that means the Building Safety Department and typically more than one permit across the building, electrical, and gas sides of the work.
What can delay an install?
Permit timing, a specific size on back order, propane tank scheduling, ledge or rock in a trench path, and winter weather. Good installers name which of these could apply to your job at quote time rather than discovering them with you later.
What paperwork should I have when it is done?
The signed quote and final invoice, permit records, the generator manuals and model and serial information, warranty registration confirmation, and the maintenance schedule. File it with the house records. It supports warranty claims and answers a future buyer's questions in one folder.
Ready to Start at Step 1?
The first call takes a few minutes and ends with a size band, a fuel read, and a site visit on the calendar.